| Für Windows: |
| |
| |
| Methode 1: HDDGURU Low-Level-Formatierungstool verwenden |
| |
|
| |
|
| |
|
| 1. |
Laden Sie das HDDGURU LLF tool auf Ihren Windows Computer herunter, schließen Sie die Installation ab und öffnen Sie das Tool.
Hinweis: Die Geschwindigkeit ist bei der kostenlosen Version auf 50 MB/s begrenzt. |
| |
|
| |
|
| |
|
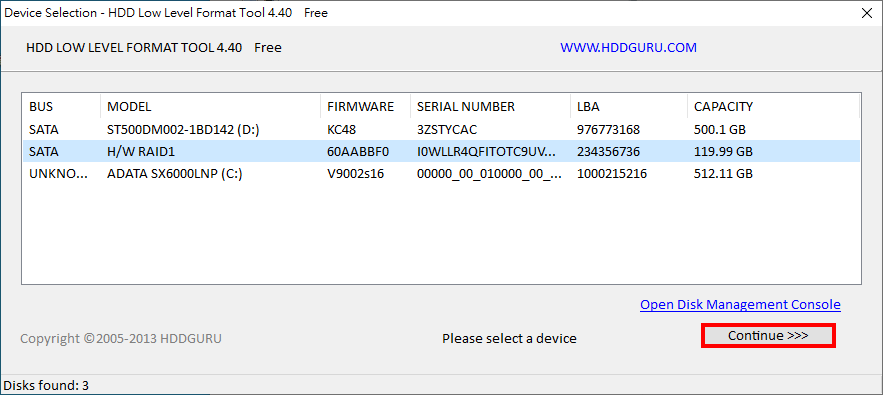
| 2. |
Wählen Sie den Datenträger aus, den Sie löschen möchten, und klicken Sie auf die Schaltfläche "Weiter".
Warning: data stored in the select disk will be erased and is not reversible |
| |
|
| |
 |
| |
|
| |
|
| |
|
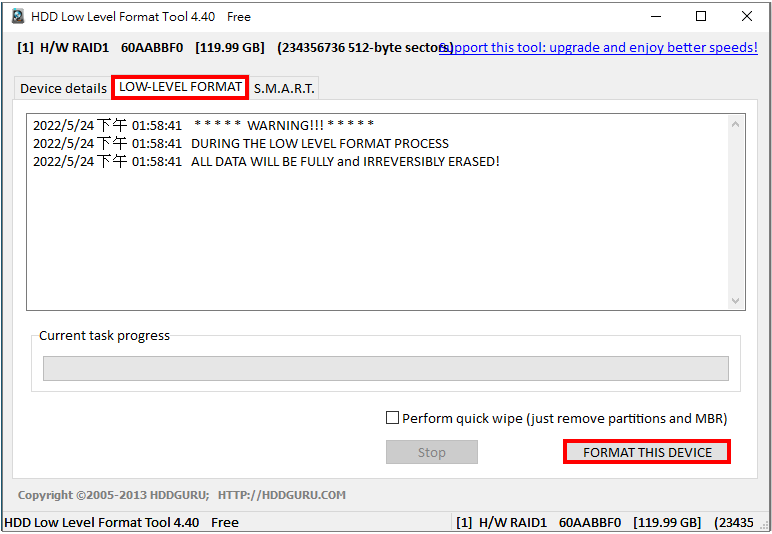
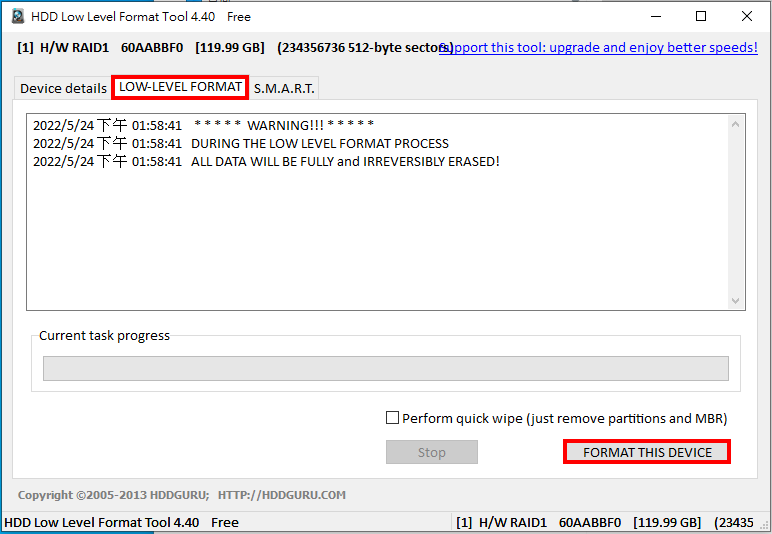
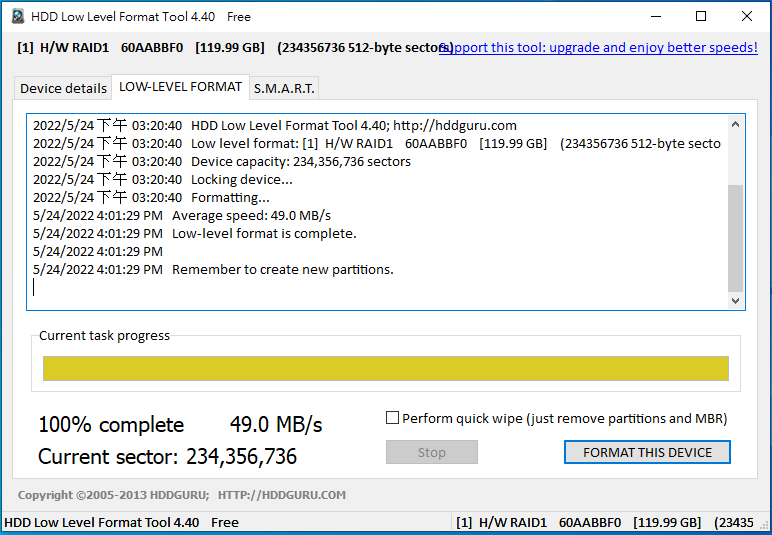
| 3. |
Gehen Sie auf die Registerkarte "LOW-LEVEL FORMAT" und klicken Sie dann auf "FORMAT THIS DEVICE". |
| |
|
| |
 |
| |
|
| |
|
| |
|
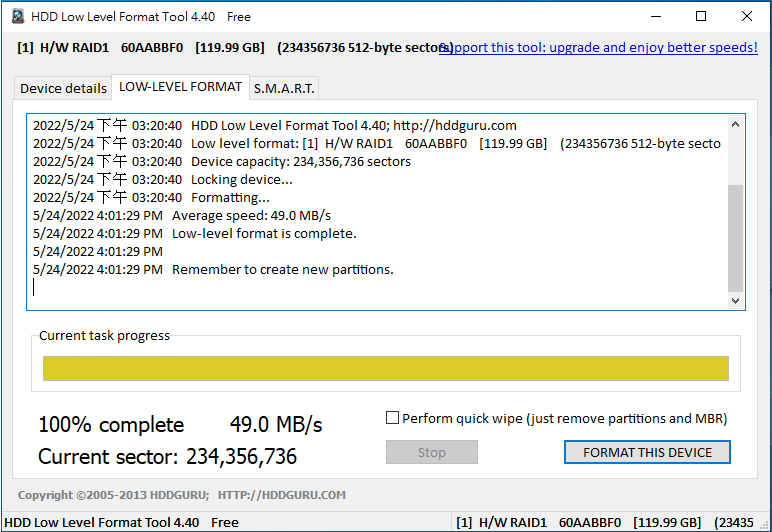
| 4. |
Schließen Sie das Tool-Fenster, sobald der Fortschritt 100% erreicht hat. Verwenden Sie dann die Datenträgerverwaltung von Windows, um den nicht zugewiesenen Speicherplatz auf der Festplatte zu konfigurieren und die Einrichtung abzuschließen.
|
| |
|
| |
 |
| |
|
| |
|
| |
|
|
| |
|
| |
|
| |
|
| Methode 2: Verwenden Sie den Windows-Befehl Diskpart, um eine Low-Level-Festplattenformatierung durchzuführen |
| |
|
| |
|
| |
|
| 1. |
Schließen Sie das Laufwerk, das Sie formatieren möchten, direkt an die Hauptplatine an, ohne ein Laufwerksgehäuse zu verwenden. |
| |
|
| |
|
| |
|
| 2. |
Klicken Sie mit der rechten Maustaste auf die Schaltfläche "Start"  und wählen Sie "Datenträgerverwaltung", um zu bestätigen, dass Windows das Laufwerk erkannt hat, und notieren Sie sich die Nummer des Datenträgers, der formatiert werden muss, da Sie ihn später noch benötigen. und wählen Sie "Datenträgerverwaltung", um zu bestätigen, dass Windows das Laufwerk erkannt hat, und notieren Sie sich die Nummer des Datenträgers, der formatiert werden muss, da Sie ihn später noch benötigen. |
| |
|
| |
|
| |
|
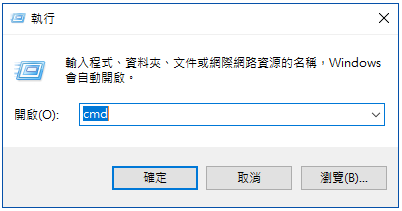
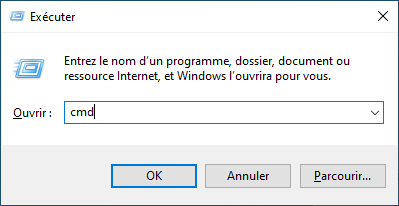
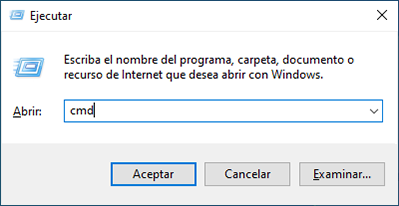
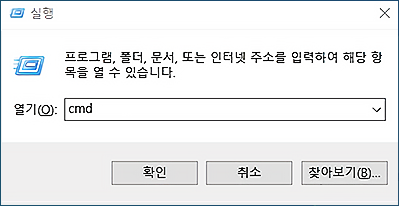
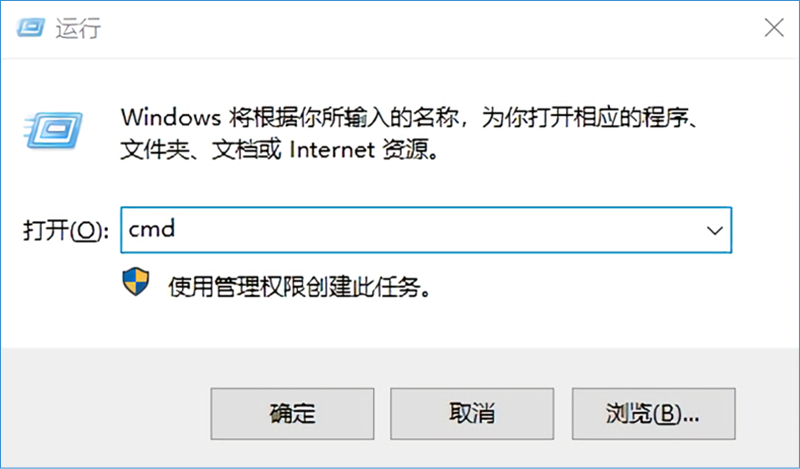
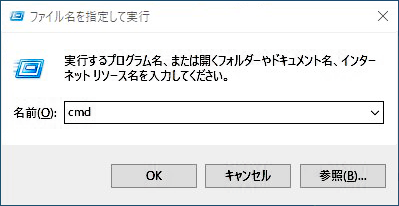
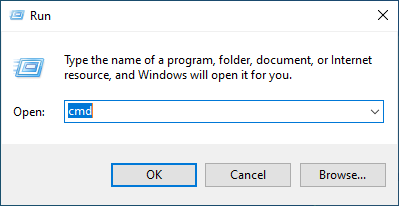
| 3. |
Drücken Sie "Windows-Taste + R" , um das Dialogfeld "Ausführen" zu öffnen, geben Sie "cmd" ein und klicken Sie auf "OK" , um eine Eingabeaufforderung zu öffnen. |
| |
|
| |
 |
| |
|
| |
|
| |
|
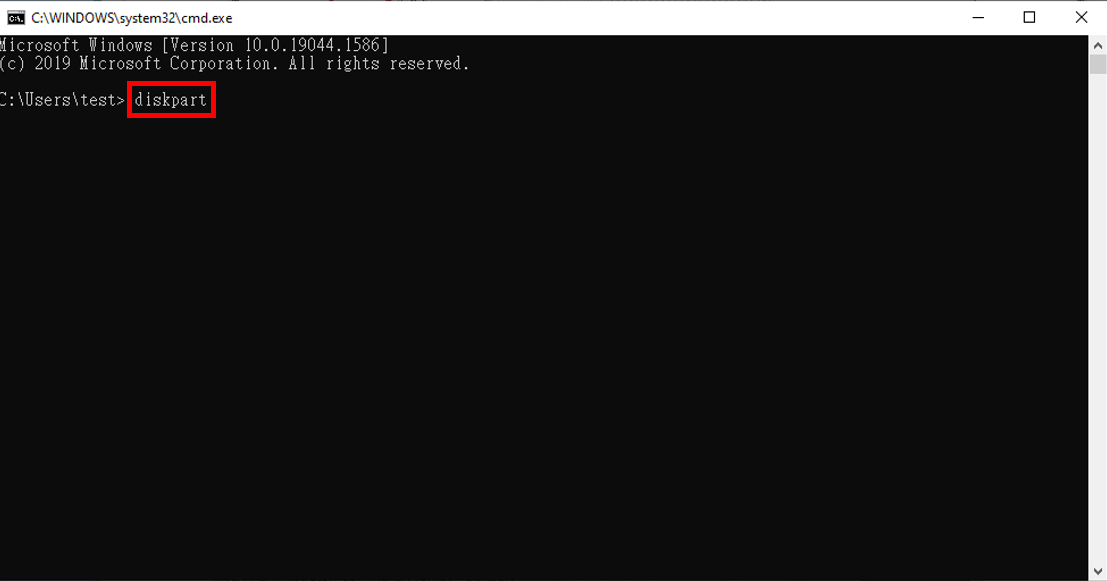
| 4. |
Sobald die Befehlszeile geöffnet ist, geben Sie "diskpart" ein und drücken die Eingabetaste. |
| |
|
| |
 |
| |
|
| |
|
| |
|
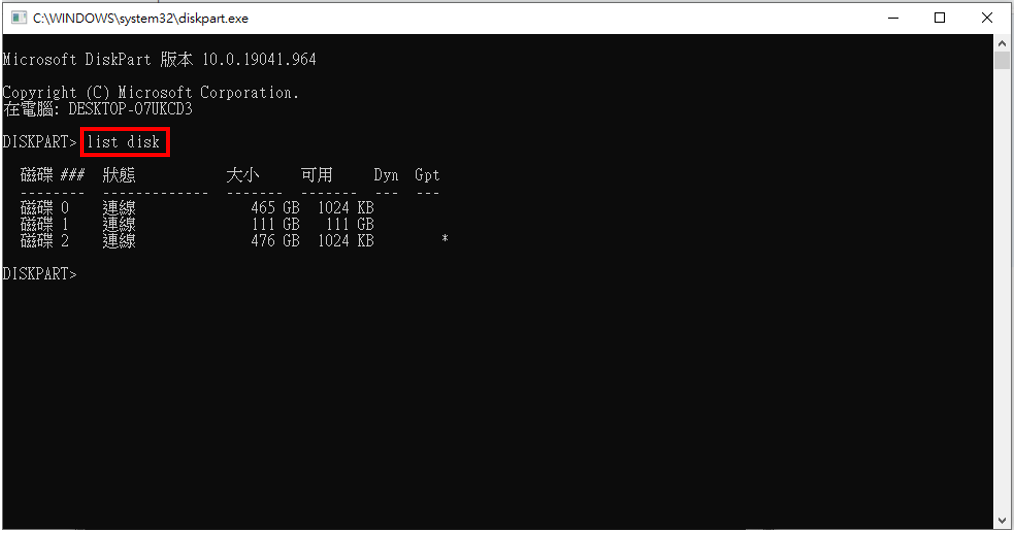
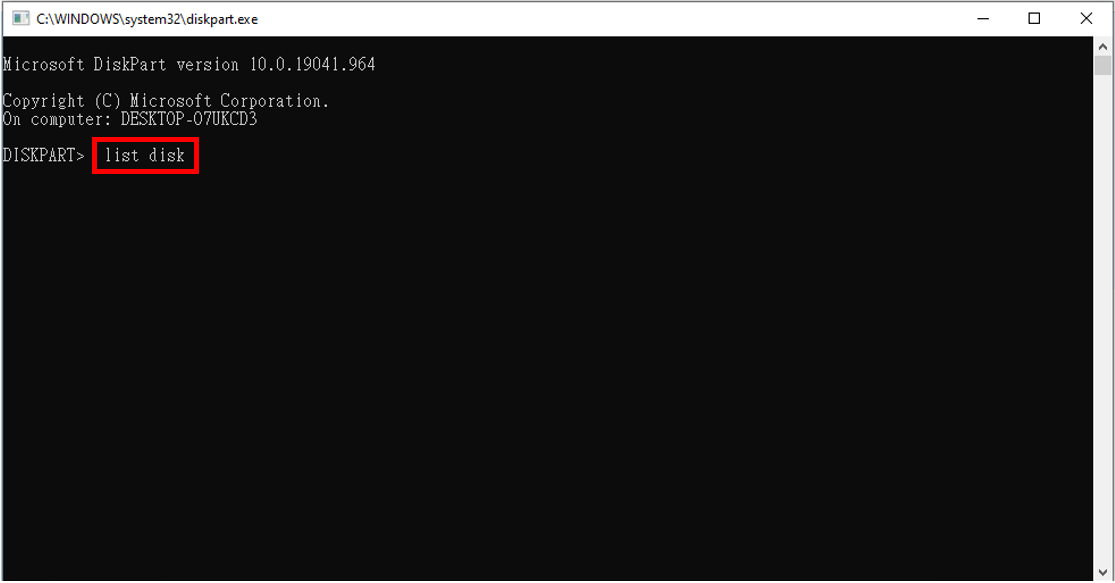
| 5. |
Mit dem obigen Befehl wird ein Diskpart-Fenster geöffnet. Geben Sie in diesem Fenster "list disk" ein und drücken Sie die Eingabetaste. Daraufhin werden alle verfügbaren Festplatten aufgelistet. |
| |
|
| |
 |
| |
|
| |
|
| |
|
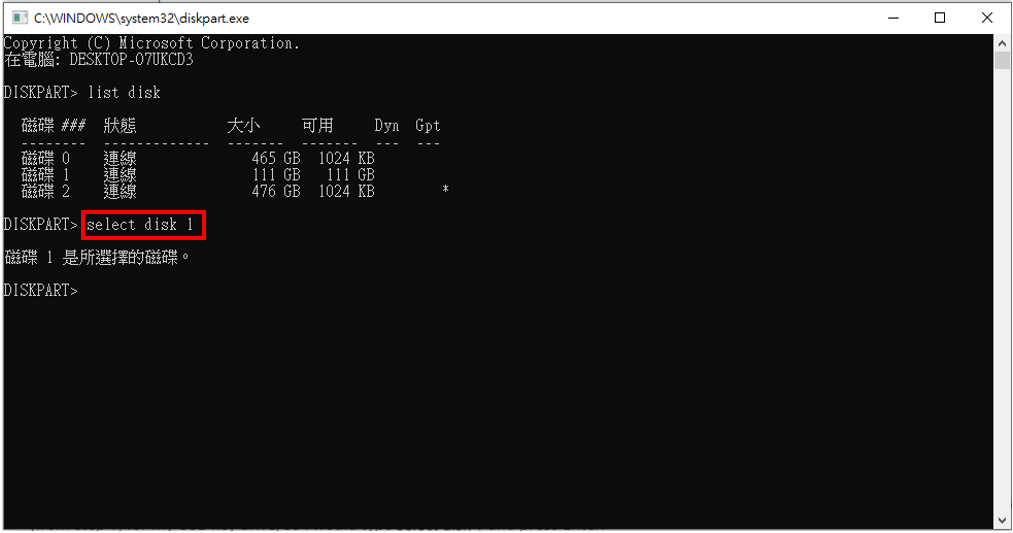
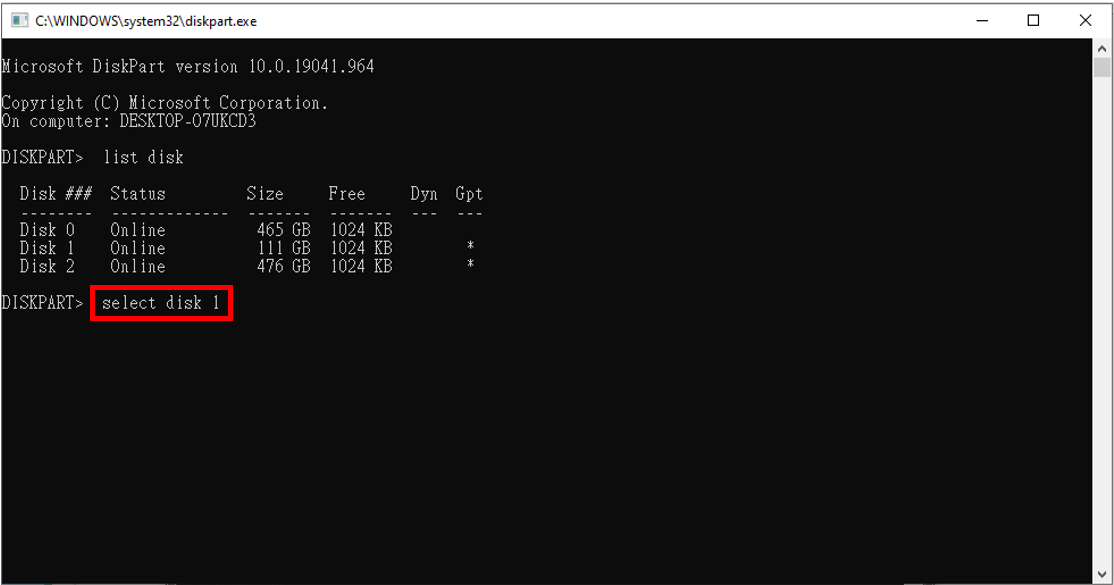
| 6. |
Geben Sie nun "select disk (Laufwerksnummer)" ein, wie unten gezeigt. Geben Sie die Nummer des Datenträgers an, der formatiert werden soll (die Laufwerksnummer, die Sie in Schritt 2 notiert haben). |
| |
|
| |
 |
| |
|
| |
|
| |
|
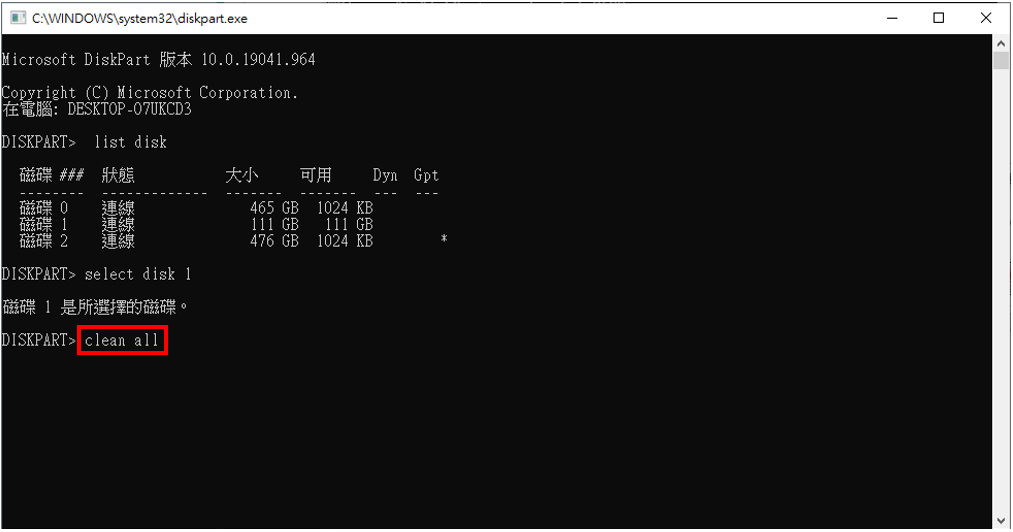
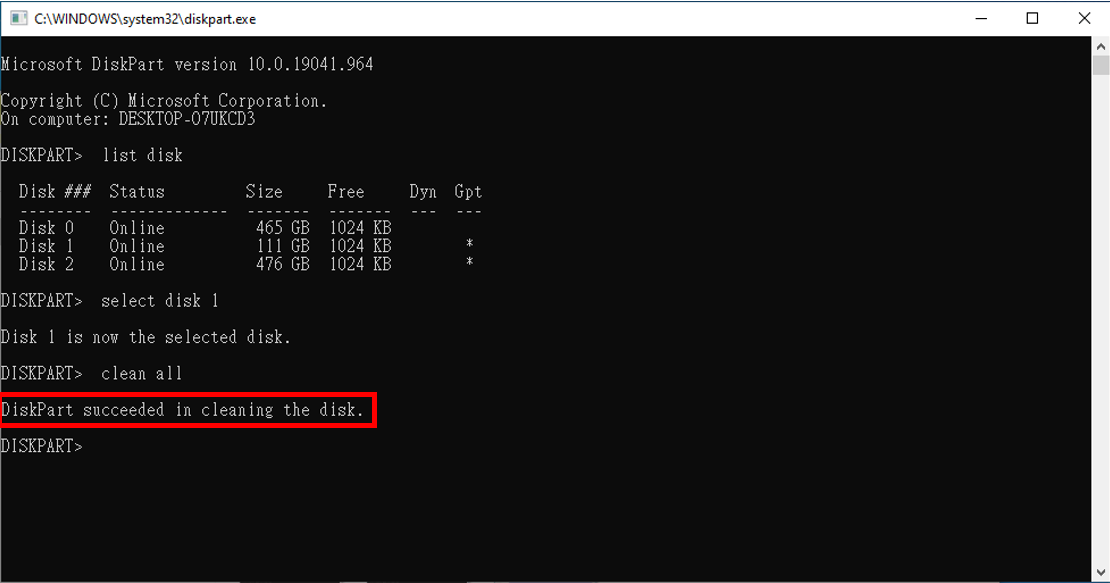
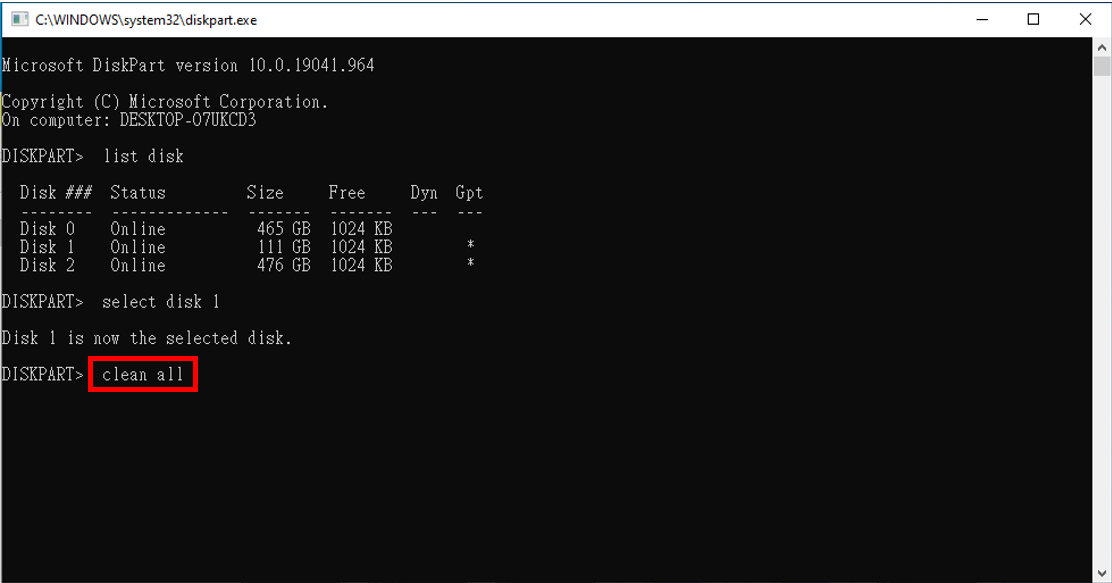
| 7. |
In diesem Schritt geben Sie "clean all" ein.
Warnung: Dieser Befehl löscht dauerhaft alle Dateien und die RAID-Tabelle und ist nicht umkehrbar. |
| |
|
| |
 |
| |
|
| |
|
| |
|
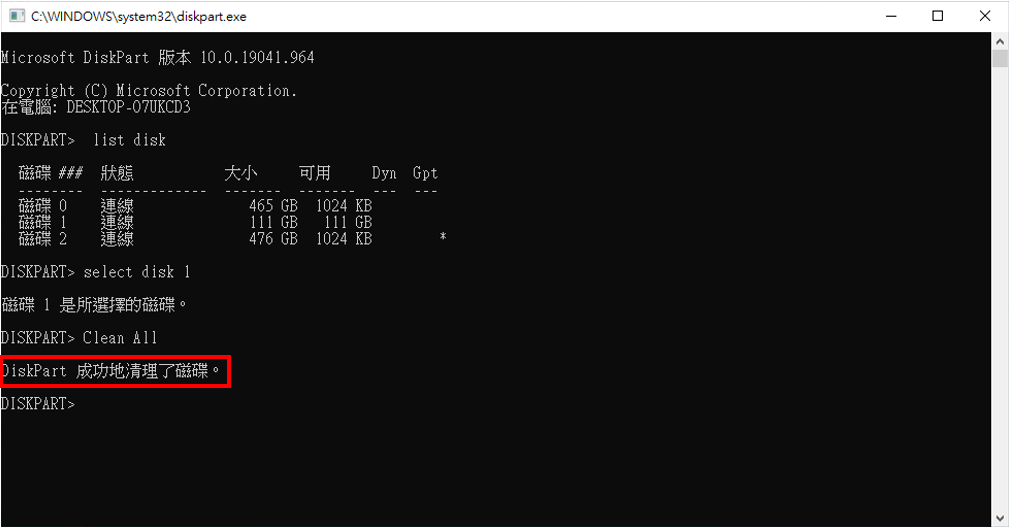
| 8. |
Nachdem die Formatierung abgeschlossen ist, geben Sie "exit" in die Befehlszeile ein und drücken Sie die Eingabetaste, um das Fenster von diskpart zu schließen. Verwenden Sie die Datenträgerverwaltung von Windows, um den nicht zugewiesenen Speicherplatz der Festplatte zu konfigurieren und die Einrichtung abzuschließen. |
| |
|
| |
 |
| |
|


 ,選擇「磁碟管理」確認Windows已識別硬碟,並記下需要格式化的硬碟編號,以備之後使用